Solar power seems simple on the surface, slap some panels in the sun and let them work their magic. But after years of tinkering with home solar setups and seeing how drastically small changes affect performance, I’ve realized most people don’t get nearly as much power as they could. The difference between an average solar installation and an optimized one isn’t just marginal, it’s enough to shorten your payback period by years or even make the difference between meeting your energy needs or falling short. Whether you’re considering solar panels for the first time or looking to squeeze more from your existing system, understanding these optimization strategies could mean thousands of dollars in savings over your system’s lifetime.
The Need for Optimized Placement
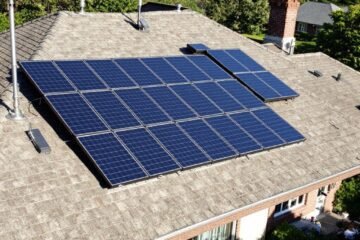
With over 163 GW of solar power installed in the U.S. and millions of homes now running on solar, you’d think most systems are working at peak efficiency. But here’s the thing: a lot of them aren’t. I’ve seen too many setups where panels are just slapped on a roof without much thought, and it drives me nuts because proper placement can boost energy production by 20% or more. That’s not pocket change. If you’re investing in solar panels for home use, you want every watt possible, right?
Shading is one of the biggest culprits. A single tree branch casting a shadow on a panel can tank its output. And don’t even get me started on wrong tilt angles. I once helped a friend reposition their panels after they’d been installed flat on a low-pitch roof. Just adjusting the angle to match our latitude brought their system’s output up by 15%. That’s why understanding solar efficiency starts with smart placement.
Understanding Solar Panel Efficiency
Not all panels are created equal. The monocrystalline panels you see on most homes today typically hit 18% to 24% efficiency, while older polycrystalline models might only reach 15-17%. But here’s what most salespeople won’t tell you: those lab-tested efficiency ratings mean squat if your panels are baking in the sun at 150°F or hiding in shadows half the day.
Temperature is a silent killer. Panels lose about 0.5% efficiency for every degree above 77°F. That’s why in hot climates, leaving a small air gap under the panels (instead of flush mounting) can make a real difference. And if you’re comparing Tesla solar panels versus other brands, don’t just look at the specs. Ask how they’ll perform in your specific environment.
Importance of Sunlight Exposure
Before you even think about installation, you need a proper sunlight assessment. I learned this the hard way when I skipped this step on my first DIY solar project. Three months in, I realized my neighbor’s oak tree was blocking the morning sun. Rookie mistake.
Now I always use a solar pathfinder or apps like SunSurveyor to track the sun’s path across my property through all seasons. In the northern hemisphere, south-facing is usually best, but the exact angle matters too. For example:
- In Miami (latitude 25°), panels perform best at a 25° tilt
- In Chicago (latitude 42°), you’d want around 42°
- In Seattle (latitude 47°), aim for 47°
These aren’t rigid rules though. If you’re trying to maximize winter production (when the sun is lower), you might go steeper. For summer optimization, flatter works better.
Optimal Tilt Angles and Orientation
Getting the tilt right is one thing, but orientation is equally important. I’ve seen too many solar installations where panels face southeast or southwest because that’s how the roof happened to be facing. While that still works, you’re leaving energy on the table.
Here’s a trick I use: for every 15° your panels deviate from true south, you lose about 1-2% efficiency. So if your roof faces southeast at 30° off south, you might be sacrificing 4% production right off the bat. Sometimes it’s worth considering ground mounts or special racking to get the orientation perfect.
For seasonal adjustments, I recommend adjustable mounts if you can swing it. Changing the tilt just twice a year (steeper in winter, flatter in summer) can gain you an extra 5-10% annual output. Not bad for a few minutes of work.
Vertical Installations and Limited Spaces
Not everyone has a perfect south-facing roof. When I lived in a townhouse with only east and west walls, I thought solar was off the table. Then I discovered vertical solar panel installations. By mounting panels on my west-facing wall at 90°, I still got about 75% of what I would have from an ideal roof setup.
Urban areas are perfect for creative solutions like this. Some other space-saving options I’ve seen work well:
- Solar carports (doubles as shaded parking)
- Balcony rail systems
- BIPV (building-integrated photovoltaics) that replace traditional materials
The new Tesla solar roof tiles are another great option if you’re doing a full roof replacement anyway. They’re not the most efficient per square foot, but they look slick and solve the placement problem elegantly.
Advanced Planning Tools
Gone are the days of guessing where to put panels. Now we’ve got tools like Solargraf that use LIDAR and AI to model your exact property. I recently used it for a client’s home and it spotted shading issues we would have completely missed. The software predicted their system would produce 8,200 kWh/year. After installation? 8,190 kWh. That’s less than 0.2% error.
Some other game-changers in solar design:
- Microinverters (lets each panel operate independently, great for shady spots)
- DC optimizers (similar benefits to microinverters but at lower cost)
- Smart monitoring systems that show real-time performance of each panel
These tools aren’t just for pros either. Many solar companies now offer free remote assessments using satellite data. Worth taking advantage of before you commit to anything.
Combating Shading and Irradiance Challenges
Shading is the arch-nemesis of solar efficiency. Even partial shading on one panel can drag down your whole string’s performance. I remember one system where a chimney shadow reduced output by 40% every afternoon. The fix? We moved that panel to a different string and added a microinverter. Problem solved.
Some other shading solutions I’ve used:
- Panel-level electronics (like those microinverters)
- Strategic array spacing (wider gaps between rows)
- Selective tree trimming (sometimes just removing a few branches does wonders)
For areas with variable weather, tracking irradiance patterns helps too. In cloudy regions, sometimes spreading panels out at lower tilt angles catches more of that diffuse sunlight. It’s counterintuitive, but it works.
Integration with Building Structures
The coolest innovation I’ve seen lately is BIPV (building-integrated photovoltaics). We’re talking solar windows, solar facades, even solar patio covers. I installed some solar shingles on my shed last year that blend right in with the asphalt ones. You’d never know they were producing power.
Some creative integration ideas:
- Solar pergolas (my personal favorite – shade and power generation)
- Solar balcony railings
- Solar noise barriers along highways
The key with any integrated system is making sure it’s still accessible for maintenance. I’ve seen too many beautiful solar roofs that became nightmares when one panel needed replacing.
The Role of Climate and Location
Location changes everything in solar. A system in Arizona might produce 50% more than the same system in Maine. But here’s what’s interesting: cold climates actually help panel efficiency (as long as they’re not buried in snow). Those solar panels in Minnesota might outperform Texas panels in January because the cold improves conductivity.
Some location-specific tips:
- In snowy areas: steeper tilts help snow slide off
- In hurricane zones: more robust mounting is worth the extra cost
- In dusty regions: factor in more frequent cleaning
Don’t assume your local solar installation company knows all this either. I’ve had to correct “experts” who tried to install Arizona-style setups in cloudy Michigan. Do your own research.
Trends in U.S. Solar Market
The solar landscape is changing fast. Average home systems are now around 7 kW, and nearly a third come with battery storage. That’s huge. When I got my first system, batteries were exotic and expensive. Now with the Investment Tax Credit covering 30% of storage costs too, it’s a no-brainer for most homeowners.
Some other trends worth noting:
- More flexible financing (PPAs, leases, and loans with better terms)
- Community solar options for renters or shady properties
- Smart panels with built-in optimizers becoming standard
The Inflation Reduction Act extended those sweet tax credits through 2032, so there’s never been a better time to go solar. Just make sure you do it right. A well-planned system pays for itself way faster than a haphazard one.
Final Thoughts on Maximizing Solar Potential
After years of tinkering with solar setups and seeing what works (and what doesn’t), one thing’s clear: small details make a big difference. Whether it’s taking the time to measure shade patterns, adjusting panel angles seasonally, or choosing the right technology for your specific situation, those extra steps add up to real energy gains. The solar industry keeps innovating, but the fundamentals remain – sunlight is your fuel, and how you capture it determines your system’s success. Getting it right means more clean power, faster payback, and that satisfying feeling when your meter runs backward on a sunny day.
FAQ
Q: What is the best direction to place solar panels for maximum efficiency?
A: In the Northern Hemisphere, south-facing panels typically capture the most sunlight. In the Southern Hemisphere, north-facing panels are ideal.
Q: How does the tilt angle of solar panels affect efficiency?
A: The optimal tilt angle depends on your latitude. Adjusting the tilt seasonally can improve efficiency, but a fixed angle equal to your latitude is often a good compromise.
Q: Can shading impact solar panel performance?
A: Yes, even partial shading can significantly reduce energy output. Avoid placing panels near trees, chimneys, or other obstructions that cast shadows.
Q: Should solar panels be placed on the roof or ground?
A: Both options work, but roof installations save space and are common in residential areas. Ground mounts allow for easier angle adjustments and maintenance.
Q: How does roof material affect solar panel installation?
A: Some materials, like asphalt shingles, are easier to work with, while others, like slate or tile, may require specialized mounting systems.
Q: Is it worth using solar tracking systems for better efficiency?
A: Tracking systems can increase energy output by following the sun’s path, but they are more expensive and require maintenance compared to fixed panels.
Sources
https://www.solarreviews.com/blog/solarreviews-solar-industry-survey-key-statistics
https://www.ionsolarpros.com/post/optimizing-solar-panel-placement-for-limited-spaces-8-tips-from-a-solar-company
https://en.wikipedia.org/wiki/Solar-cell_efficiency
https://seia.org/research-resources/solar-industry-research-data/
https://www.solargraf.com/blog/mastering-solar-panel-layout-importance-of-optimal-placement/
https://pmc.ncbi.nlm.nih.gov/articles/PMC9478504/
https://www.cnet.com/home/energy-and-utilities/most-efficient-solar-panels/
https://risingsunsolarsolutions.com/solar-panel-design-layout/
https://scholarworks.uark.edu/cgi/viewcontent.cgi?article=1022&context=eleguht
https://www.sunsave.energy/solar-panels-advice/how-solar-works/efficiency